Thursday, July 8, 2010

Thrifty Thursday: The Fork Ran Away with the Spoon.

Or maybe I should call it Two-Fer Thursday, because you’re also getting a sneak peek at the wall color. Not that it’s anything fancy, but it’s still a little peek ;) At some point long, long ago, I mentioned that my mom got me this 1970’s huge wood fork and spoon set that I had been searching high and low for: IMG_6669

I don’t even remember the price, so I’m really failing you this week. However, I want to show you how to rig these to hang the opposite way they were intended for cheap. I’d seen them all over the interwebs hung the proper way, by those holes at the bottom of the handles:

As you may know by now, I don’t like doing things the proper way. Ever since I took a picture of them sitting on the floor the opposite way, I knew I wanted to hang them like that. But these things are huge. And pretty heavy. So coming up with some way to hold them was no easy feat. Here’s a comparison to show you the ginormousness of these monstrosities:

IMG_6674 It was intended to be a picture of the chair with the utensils, but you know Rupert. Has to pose for every picture. So I went to Lowes to troll the aisles and come up with something to hang these things. I remembered something with a rubber end, called a u-hook, and thought that would be the ticket… however they are spensivveee. And this is THRIFTY Thursday, not spend a Hook and a leg to hang thrift store finds. I finally landed in the door hinge aisle, and saw these:

IMG_6728

They look like an octopus, so I’ll call them Octo-Hooks. They’re under $5 for two in a pack. I was relying on a miracle for these to be wide enough and strong enough for my utensils.

My super scientific formula for hanging these was to have Hussy hold them up on the wall as I stood on the other side of the room and said “up” “down” “left” and “right.” Then I had him hold them in place as I slipped the first hook under/behind and rubbed the hook on the wall to make a mark. Luckily, being black, it did a fine job leaving enough of an imprint to keep my spot as I did the same for the second one.

Then I simply held the hook up to the wall, and drilled the screws it came with in the holes. No need for pilot holes or stud finding, it just grabbed on and stuck. Then I hung the utensils and it worked like a charm.

IMG_6740 It was so easy, a caveman could do it.

IMG_67292  

Hook, line and sinker.

Done.

For the record, I’m Team Flo.

Wednesday, July 7, 2010

Walking The (Fake Wood) Planks.

And there’s no turning back now! Sadly, I picked one of the hottest days ever do do this alone. Pulling down those MASSIVE sheets of paneling. No joke, those are almost as wide as I am tall, and they’re of course 8 foot TALL on top of that. They were heavy. We don’t have central air. That’s right folks, I was sweating something fierce while firing off these guns for hours.

IMG_6617

I had to pull from the middle with the back end of a hammer, get a grip, pull off the top, let it fall enough to grab a hold of, then pull it to the side to rip off the bottom and take to the end of the room. Following me still? It was a workout just typing all the steps, much less getting er done IRL.

IMG_6618

Remember that L word I like to throw around a lot? Laziness to the extreme: leaving all my glass and porcelain things sitting in the middle of the table. I created a little more work for myself trying to avoid them. What? I need all the time I can get to create fake rooms in photoshop :)

Now, I know you’re going to be super jealous of this smokin color scheme. Wall color is straight out of the 50’s, where they had like 2 colors to choose from. They picked Pollen Yellow. The trim must have come with the paneling in the 1970’s. It’s all WASABI!

IMG_6663 Hot, right? I know. I should have kept it. However, I found some nice character lying beneath the paneling. Like a piece of drywall that apparently flaked off. In staying true to his character, and his love of duct tape, my grandfather taped the piece of drywall back on. That tape is 40 years old. It won’t come off.

IMG_6632  Also, I’ve decided the trim was painted after the paneling went up. How did I come to this conclusion? Ohhhh, I don’t knowww…

 IMG_6629

I actually think the picture turned out kind of cool. I might grayscale it and frame it in the room. The fun part in all of this was pulling nails. At least 200 of them sat in this cup when I was done.

IMG_6624 Now the issue is there’s plumbing behind this one last panel. EXPOSED plumbing, to the bathroom. So until we figure out what we’re going to do with it, I’m keeping it as my room’s flair.

IMG_6626 Now what I’m sure you really only care about: a preview of the colors. The wall sample is on the wall, the furniture sample is on the furniture. I know, I really make it tough to figure these things out! :)

IMG_6662 What I never knew about white before was how well it photographs. Which gets me super excited about showing it off :D Do you have any white rooms that are super stylish? Have any in your inspiration files? I’m looking for some more ideas for accessorizing so please share!

Tuesday, July 6, 2010

The Always Growing To-Do List Just Grew Some More.

So you remember that whole kitchen remodel we’ve been tackling for, oh, I don’t know, 4 months? Well, it’s about 99% done. Literally, all we have to do is hang 2 more panels and install our shelves back in place. But we’re lazy.

Well, not THAT lazy. Last weekend, while Hussy was out for a dudes day, I tackled this room:

11 Wow, it’s crazy to see what it looked like a week ago! Well, Muscle Woman over here tore down all that paneling AND carried it outside with her own bare hands. ROAR. Of course, that’s the prettied up version of wood paneling. This is the true beginnings of this room  when I signed the dotted line on this house:

16Want to take it back even farther old school?

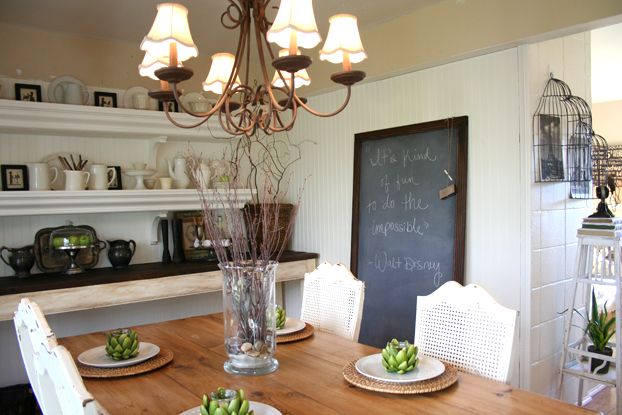
Yeah, that’s my family in this dining room. When I was probably 12ish years old? I kept my grandparents dining table and tried to update it some:

17

I said TRIED. We ended up selling off the set for a longer table in a cherry shade and I’m still collecting dining chairs :)

So, as I twiddle my thumbs for Hussy to cut the cabinet panels so they can go up, I’ll be working on, and showcasing, the projects going on in this room. Get psyched people. This room won’t be like any of the others. We’re putting the move to the country on hold, so I’m bringing the country to the most appropriate room in the house. Where we eat our home cookings!

TO tide you over, I’ll give you a peak at some inspiration I pulled for this room, though almost everything that will go in here I already own… so my inspiration was limited to what worked with what I’ve got!

I love the white slip covered sofas, and all the different shades of wood popping off the saturated whiteness. This goes along with our white slip covered dining chairs, and with a lot of hand me down/given/purchased wood items in all different shades… I’m lazy. And don’t feel like staining.

{Country Living}

This is by far my biggest inspiration. It’s bright, it’s welcoming, and that oar reminded me of my wooden spoon and fork I need to work into my room. I also fell in love with the shade “Agave” by Behr, and realized it’s a lot like the shade of her estate sale find in the bottom left corner of this picture. Even the collage on the wall could be used in our room to cover up all the eyesores I don’t feel like fixing that loomed behind the paneling for decades.

{The Lettered Cottage}

More inspiration for the “Agave” drawers I want/need/must have:

{Perfectly Imperfect}

The shelves, the pitchers, the green apples, all the things I love. And those birdcages are awesome!

{The Old Painted Cottage}

I LOVE this space. It’s so calming. The dark woods contrasting off the white walls, the white accessories fading into the background, the dark accessories molding into the shelves, and those barstools? Obsessed! I wish our ceilings were tall enough to create beams on. Hmmm… how tall are they again?

Casual Open Beach Kitchen

{Coastal Living}

Black on white again, wood tones, and lots of texture. Are you seeing a trend with these ceilings though? I’m going to go crazy until I get get these babies on my ceiling!

Black & White Modern Master Bedroom

{Coastal Living}

Can you picture what it will look like now? Pretty cut and dry, really. Stay tuned :)

Sunday, July 4, 2010

Happy 4th of July!

     IMG_7102 I know I’m super tardy to the party, being 5:30pm and Independence Day almost over. But I’ve been my usual self all day: redecorating the house. Nesting kicks in full speed when I’m stuck at home more than a day :)

We used to go watch the fireworks at The Diamond here in Richmond, but they stopped when we lost the Richmond Braves, and before we got Nutzy and the Flying Squirrels back in it’s place. We would stand in the parking lot right next to the stadium. Completely free front row seats.

fourth234fourth233

Now we found a new favorite tradition: Lake Anna fireworks! We meet up at my parent’s campsite they have year round:

IMG_6980

Then head out on the boat to watch the show:

IMG_7108

See all the boats on the horizon? I love watching the fireworks out there. Here’s El Capitan and I last year:

IMG_7011

IMG_7031

Tomorrow will be the Beaverdam Parade. That’s kind of a big deal in small town USA, especially when my dad is the Mayor of Beaverdam. I feel kind of special.IMG_6832

Notice I’m not the only fan of Electric Blue in the family. Like Father like Daughter.

IMG_6838 We’ll probably sit at the same spot, collect candy thrown (hard) at us by little league baseball players, and then listen to the Mayors speech and hope our favorite Miss Beaverdam contestants win. I actually tried out one year, and didn’t make it. The winner had an excellent speech about growing up there, and I was a skeletal size 0. So I can understand that outcome.

blonde

Kind of. I still thought the sweet demeanor and soft blonde hair would sway the judges. Maybe I should have kept my mouth shut. Braces were cute when I was 10, not at 18. I’m at least proud to be the Mayor’s Daughter ;)

So have a Happy Independence Day everyone. I’ll see you back here tomorrow!

Friday, July 2, 2010

A Kitchen Renovation: Chill Out!

Our old fridge has been in this house for a VERY long time. Long enough that I barely remember my grandparents buying it. That means it’s REAL old. It was pretty dirty

IMG_6594IMG_6596

And it was starting to show it’s age elsewhere. Wasn’t making ice properly, the water wasn’t filtered so we couldn’t use the door. Probably not the worst problem in the world if the thing still kept our food pretty cold, which was the point of the fridge. However, that’s a lot of space taken up by an icemaker and water dispenser when we actually like to store more than 2 meals. We decided to replace it. And benefit from a tax rebate.

IMG_6600

Bye bye fridge. You’ll always hold a special place in my heart.

Now. In with the new! It’s a Whirlpool. Surprisingly, sold out since we bought it!

IMG_6606Why did we get a french door/bottom mount freezer? Well, it’s not because it’s trendy. Or the fact that it’s so much more expensive than a side by side and I just like blowing money. It’s cause it holds a TON of food in the fridge part, and wider things than we could previously fit. Also, the bottom mount freezer means I CAN REACH EVERYTHING! Power to the shorties!

This one sticks out less than our old one. It’s almost counter depth! IMG_6648

And is seamless with the doorway.

IMG_6660 Now time for a little flashing. This fridge isn’t shy.

IMG_6649IMG_6651

Oooohhh aaahhhh. My favorite part is the can dispenser. Just open up that perforated area on the box, and slide the dispenser plastic bin over the end of the box, and pop it in the door. That grip is solid too. It’s almost tough to pull out a can, which is important in ensuring it staying tucked in it’s holder.

IMG_6653

bliiinded by the liiight. Look at all that space! There’s only one lone TOE-MAY-TOE in the veggie bin. Hopefully that will change soon since I so embarrassingly only have condiments and beer stocked. Yes, I dedicated an entire shelf to all our beer. My man is pleased.

IMG_6654

Here’s the freezer. I love that I can get to it from both sides comfortably as well as overhead.

IMG_6656 I was shocked to find how many bottom mounts didn’t seem to have room for pizza boxes. Call me unhealthy, but that’s a staple in this house. Every week. Except this time, because we just ate our last box. It’s so nice and roomy. Swooooon :)

IMG_6658

I’ll leave you with a goodbye from Ceiling Cat.

IMG_6611

He’s watching what you eat, so you don’t have to.

Thursday, July 1, 2010

Thrifty Thursday: A Jarring Project.

Apparently since I found this tutorial, this craft has blown the eph up online. There’s a reason, it’s awesome. And SO easy. I decided to make them for my Mommy’s birthday, and I had more left over to make for my deck.

IMG_6569 I picked up a 12 pack of Mason Jars at Wally World for $6.60, and two 4 packs of gel food coloring for $3.60 each, and I had mod podge on hand.

IMG_6562

IMG_6564

I pour a small amount of Mod Podge on a paper plate, a drop or two of food coloring, dab a paper towel in it and sponge it all over the jars.

IMG_6565

It can’t get any easier, but it really was fun. And quickly rewarding, as it dried in about 10 minutes. I just watched Couples Retreat while I waited.

IMG_6566

Mine came out more matte than most of the ones I’ve seen, but I like this because I have SO MUCH glass in my house. It’s a refreshing mix now. I just love gray purple and green together:

0623002231 I’ll be using it for vases and candle holders. Or in the above case, both at the same time. I couldn’t make up my mind which way to photograph, so I just went all in. Please don’t try this at home, kids. Well, you can if you DON’T light the candle on the bottom. You’ve been warned.